 Local Hair Color
How to choose the best photo for a hair color try-on
The photo you start with shapes every shade you try on it. A hair color preview keeps the light, shadows, and texture already in your picture, so a clear, honest photo gives you previews you can actually compare. The good news: the best one is often a simple selfie you already have.
The short versionThe best photo for a hair color try-on shows one person, from the shoulders up, in soft even light, with hair that’s sharp and stands out from the background. Skip heavy filters, strong backlight, and blurry or screenshotted images. Then keep a second photo in different light to double-check your favorites.
Look for soft, even light
Daylight from a window, or open shade outdoors, usually shows hair beautifully. It lights up the natural highlights without blowing them out, and it keeps both sides of your head looking like the same color.
Mixed light is the tricky one. A cool window on one side and a warm lamp on the other can make one shade look like two. A flash photo with a bright hot spot and deep shadows around it can make the new color look patchy, even when the selection is perfect. The preview can only work with the light the camera captured.
Frame from the shoulders up
A head-and-shoulders or three-quarter view gives enough detail to see texture and edges while still showing how a color sits next to your face and clothes. In a far-away, full-length shot, a whole curl may be just a few pixels, and no brush can recover detail that tiny.
If length matters to your decision, keep your ends in the frame. A tight crop is lovely for checking the hairline, but it won’t show how the color reads across your whole shape.
Give your hair some contrast
The app finds your hair by reading where it ends and everything else begins. Dark hair against a dark wall, or light hair against a bright sky, hides that edge. The background doesn’t need to be plain. It just needs to differ from your hair in brightness, color, or texture.
Watch your shoulders, too. Long dark hair resting on a dark sweater is a classic spot where you may need to brush in a few corrections. That doesn’t rule the photo out; it just means a little more editing.
Make it just you
With several people in a picture, it’s unclear whose hair should change. Start with a photo of one person. If your favorite shot is a group photo, crop a copy around yourself in the Photos app first, then choose that copy.
Use a clean original
Motion blur smears the line between hair and background. Screenshots of social posts and photos that have been sent around a few times often pick up blocky compression around the edges. The original file in your library is almost always the better choice.
Beauty filters matter as well. Many of them smooth skin, shift warmth, and change the shine on your hair. If you want to know how a color looks against the way you really look, choose an unfiltered photo.
Photo do’s and don’ts at a glance
If you’re scrolling through your camera roll right now, this is the quick filter. A photo that misses one of these can still work. If it misses two or three, it’s usually quicker to pick another.
Reach for
- One person, facing the camera or turned slightly
- Window light or open shade
- Hair in sharp focus, with visible texture and shine
- A background that differs from your hair color
- Your usual styling, so you’re judging the look you actually wear
Skip for now
- Strong backlight that turns your edges see-through
- Mixed warm and cool lights in one frame
- Heavy filters, screenshots, and very compressed images
- Hats, hoods, or hair tucked mostly out of view
- Group shots you haven’t cropped
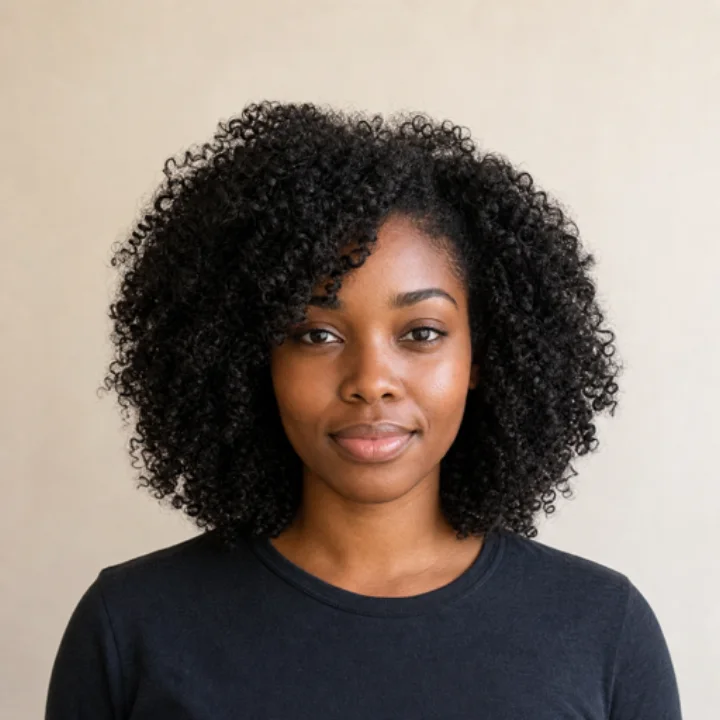
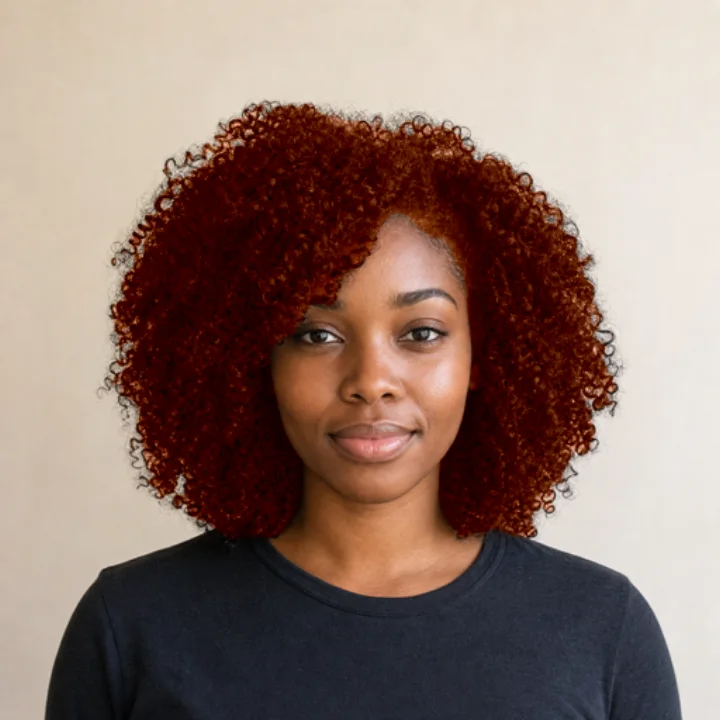
Selfies, portrait mode, and the back camera
A selfie works well. Face a window, hold the phone around eye level, and let the light fall evenly on your face and hair. Holding the camera very close can exaggerate the front of your face and crop your hair, so an arm’s length or a little more is kinder.
Portrait mode is worth a second look. The blurred background can be flattering, but the effect sometimes softens flyaways or blurs the outer edge of your hair along with the background. If a portrait mode photo looks smudgy around your hairline when you zoom in, try a regular photo instead. On many iPhones you can also turn the depth effect off for that photo in the Photos app and use the sharper version.
If someone else is taking the picture, the back camera often gives you a cleaner file. Either is fine. What matters most is focus, light, and contrast.
Why a second photo in different light helps
One photo is great for narrowing things down. It can also fool you. A copper preview in warm evening lamplight may look richer than the same shade in morning daylight, and a cool silver can look very different under office lights.
Once you have two or three favorites, try the same shades on a second photo taken somewhere else: outdoors in shade if the first was indoors, or by a window if the first was in the evening. If you still love a shade in both, that’s a steadier preference. Our guide to comparing hair colors on your own photo walks through that round in more detail.
Take a fresh one if you can.
Stand facing a window during the day, hair styled the way you usually wear it, and take three quick shots. One of them will almost certainly beat anything in your camera roll.
When you’ll still want to touch up the edges
Even a great photo has hard spots: fine flyaways, see-through ends, braids with gaps, curls crossing your face, and hair partly behind your shoulders. In Refine Selection, Add Hair brings in missed strands and Remove Hair keeps color off skin, clothes, and background. Use the small brush near your hairline and a larger one for broad areas. Undo takes back a single stroke, and Reset to Automatic starts over.
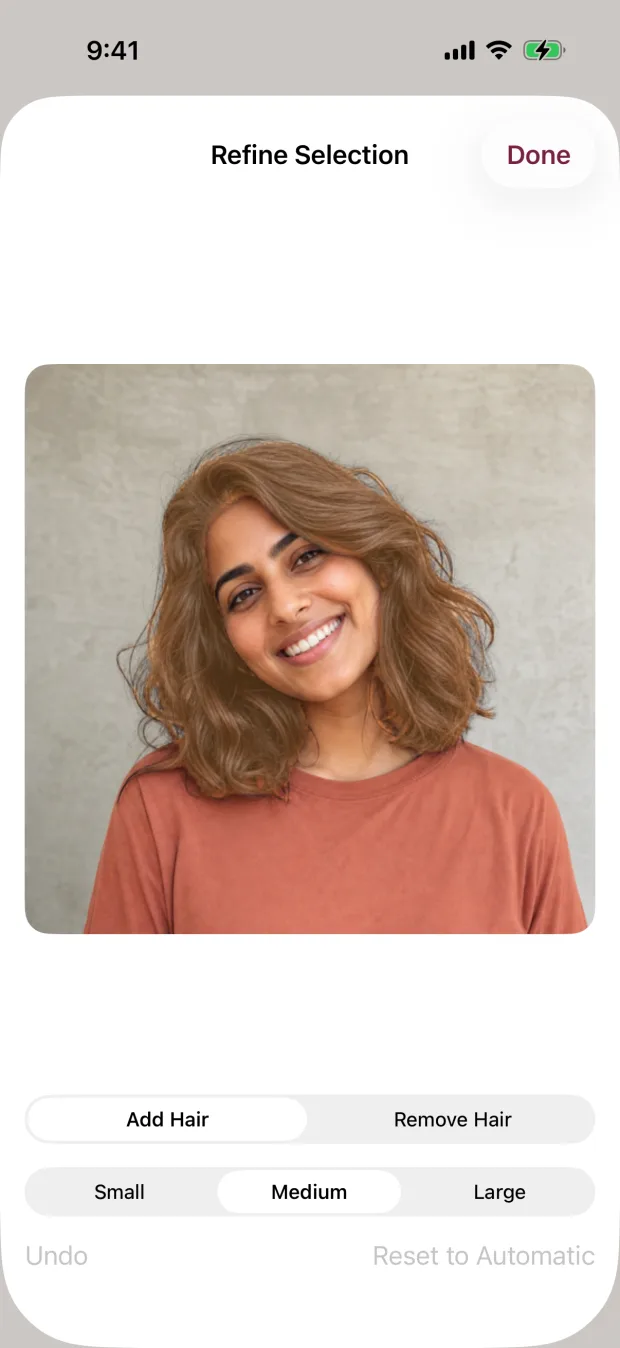
Once your photo is ready, the full walkthrough in how to try on hair color from a photo on iPhone covers every step from choosing shades to saving a copy.
A good photo makes a clearer preview, not a prediction
Even the best photo shows a color direction, not what dye will do. Your real result depends on your starting color, past color and treatments, your hair’s condition, the products, and the technique. Follow the product instructions, including any strand test or allergy test they call for, and ask a qualified colorist whether a big change is realistic and how many visits it might take.
Best-photo checklist
- One person, shoulders up
- Soft, even daylight
- Hair sharp and fully visible
- Contrast between hair and background
- No heavy filter or screenshot
- A second photo in different light for your finalists
Quick questions
Can I use an old photo for a hair color preview?
Yes, as long as it’s clear and well lit. Keep in mind that if your hair length or color has changed a lot since then, a recent photo will be closer to how you’ll look.
Should my hair be up or down?
Down, or however you usually wear it. More visible hair gives the preview more to work with, and you’ll be judging the look you actually live in.
Does the photo need to be high resolution?
A normal iPhone photo is plenty. Sharp focus and good light matter far more than megapixels.
Is my photo uploaded when I choose it?
No. You pick one photo with Apple’s picker, and the app finds your hair and shows previews on your iPhone or iPad.