 Local Hair Color
How to change hair color in a video on iPhone
A photo shows you one moment. A short video shows how a color moves: how it catches the light when you turn your head, how it looks as you walk from shade into sun, how it sits when your hair swings. If you’ve liked a shade on a photo and want a second opinion, a clip is a lovely next step.
The short versionTo change hair color in a video on iPhone, unlock access in Local Hair Color, choose a short, evenly lit clip of one person from the main screen, pick a shade, and set the intensity. Choose Quick or Quality under Save quality, then save. You get a new MP4 with the original audio; your original video is unchanged.
Choose a clip that’s easy to follow
In a video, the app has to find your hair again and again as you move. The easier each frame is to read, the steadier the color looks. A good first clip is:
- Short. A few seconds is plenty to judge a color, and it saves faster.
- Evenly lit. Daylight from a window or open shade, without a bright light behind you.
- Just you. One person in the frame, with hair visible and not tucked under a hat.
- Gently moving. A slow head turn or a few steps works better than spinning, dancing, or shaking your hair out.
Contrast helps here just as it does in photos, so a background that differs from your hair color is a plus. The tips in how to choose the best photo for a hair color try-on apply to each frame of a clip too.
Unlock access, then choose a video
The app is a free download, and setup shows a shade on your own photo before you pay. Video editing is part of full access, which is either Weekly, an auto-renewing subscription, or Lifetime, a one-time purchase. You can see the price in the app or on the pricing page. If you already have a yearly subscription, you can restore it.
Once access is unlocked, choose a video from the main screen. Apple’s picker shares only that clip with the app. There’s no upload and no account.
Pick a shade and intensity
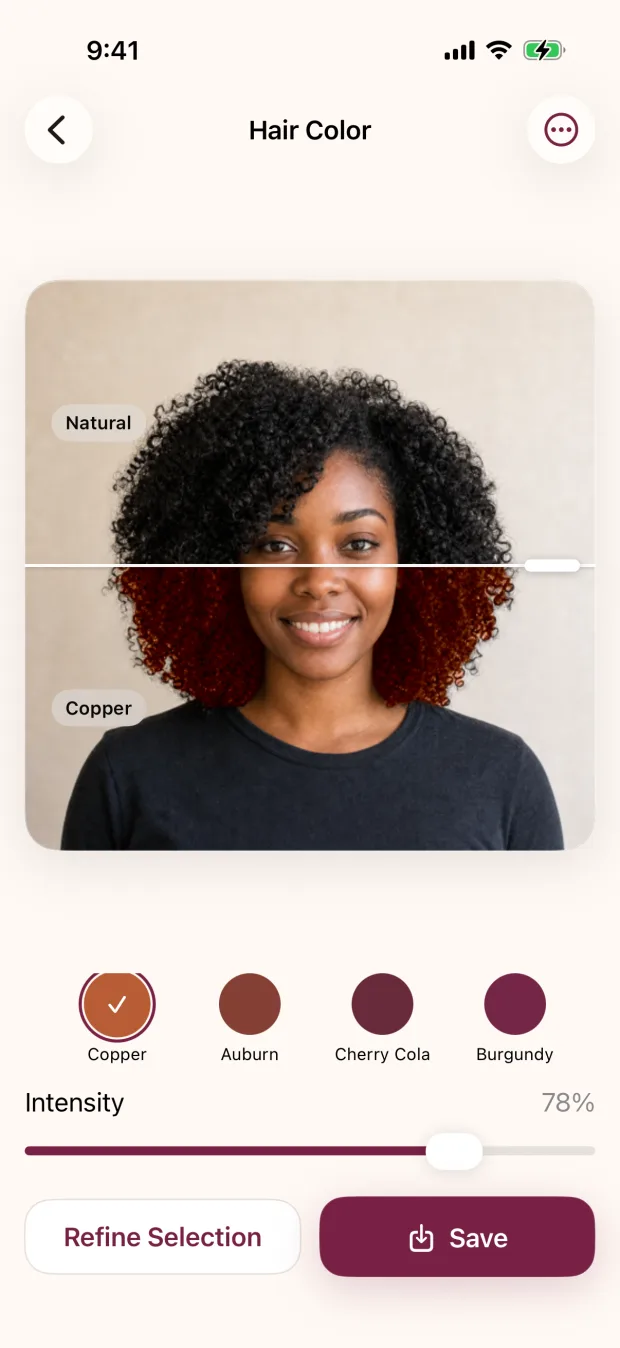
The same sixteen shades are there, from Teddy Bronde and Espresso through Copper and Cherry Cola to Pink and Blue, plus Custom for any color you choose. If you’ve already compared shades on a photo, start with your favorite. If not, try a couple of very different ones first.
The intensity slider works just as it does for photos: lower lets more of your own color show, higher makes the change obvious. Tap Natural in the shade row to see the original clip, then tap your shade again to compare.
Choose Quick or Quality, then save
Under Save quality you’ll find two choices:
- Quick makes smaller files and saves faster. It’s the easy choice for a first look.
- Quality refines the hair in every saved frame. It takes longer, and it’s worth it when there’s more movement or you want the cleanest result to keep.
Saving writes a new MP4 to your library with the original audio kept. Your original video is never overwritten, and the new file leaves out GPS location, the original filename, camera serial, and unrelated details. The app asks for permission to add to Photos only when you save.
Very long or very high-resolution clips may be too large to process. If that happens, the app will ask for a shorter or lower-resolution clip. Trimming in the Photos app first is an easy fix.
Watch the saved clip all the way through
Open the new video in Photos and watch it from start to finish, then once more with your eyes on the edges. Look at the hairline, the ends, and anywhere hair crosses your face or shoulders. Pause on the moments you moved most. If the color stays put in those frames, you’re set.
Why the brushes are for photos only
In photos, Refine Selection lets you paint in missed strands with Add Hair and Remove Hair. A video is hundreds of frames, each with the hair in a slightly different place, so a brush stroke on one frame wouldn’t line up with the next. Instead, the app finds your hair in the video on its own, and your choice of clip and save quality does the work the brush does for photos.
If the color flickers or slips
Fast motion, hats, hair crossing your face, and dim or backlit scenes can make the selection less consistent from frame to frame. You might see the color flicker at the edges or briefly miss a section. Try these, in order:
- Save again with Quality, which looks at the hair in every saved frame.
- Trim to the calmest few seconds of the clip.
- Film a new clip with softer, even light and slower movement.
- Move somewhere with more contrast between your hair and the background.
If you want pixel-perfect edges for a still image, a photo gives you more control. Our guide to changing hair color in a photo on iPhone covers the brush tools.
Film it on purpose.
Stand by a window, hit record, turn slowly to one side and back. Five seconds like that tells you more about a color than a minute of casual footage.
Ideas to try with a video
- See how a shade moves in daylight: film a short walk from shade into sun and watch how the color changes.
- Record a slow head turn to see a color from the front and both sides.
- Try a bold color on a short, fun clip to share with a friend.
- Save the same clip in two finalist shades and watch them one after the other.
- Bring a clip to your colorist alongside your saved photos, so they can see the color in motion.
A moving preview is still a preview
A video shows a color direction in the light you filmed. It can’t predict what dye will do, or whether your hair needs lightening to get there. Your starting color, past color and treatments, condition, products, and technique all matter. Follow product instructions, including any strand or allergy test, and ask a qualified colorist about bigger changes. For the full photo workflow, see how to try on hair color from a photo on iPhone.
Video checklist
- Short clip, even light, one person
- Slow, gentle movement
- Shade and intensity chosen, compared with Natural
- Quick for a first look, Quality to keep
- Saved clip watched all the way through
Quick questions
Can I change hair color in a video for free?
Video editing and saving are part of weekly or lifetime access. The free setup shows a shade on your own photo, so you can see how the app works before you pay.
Does the saved video keep the sound?
Yes. The original audio is kept in the new MP4.
Is my video uploaded?
No. Finding your hair, previewing, and saving all happen on your iPhone or iPad.
Why can’t I use the brush on a video?
Refine Selection is for photos. In videos the app finds the hair on its own. If the result isn’t steady, try Quality, a shorter clip, or better light.