 Local Hair Color
How to change hair color in a photo on iPhone
Sometimes you just want to see yourself with pink hair. Or you’re putting together a mood board, making a playful post, or planning a costume color for a party. Whatever the reason, changing hair color in a photo on your iPhone takes a few minutes, and a few careful touches make the difference between an obvious edit and one that looks natural.
The short versionTo change hair color in a photo on iPhone, choose a clear photo in Local Hair Color, let it find the hair, pick a shade or a Custom color, and set the intensity. Brush in any missed strands in Refine Selection, tap Natural to compare, then save. You get a new photo; your original stays untouched.
Choose one clear photo
Tap to choose a photo, and Apple’s picker opens. Only the photo you pick is shared with the app, not your whole library. A shoulders-up shot with visible texture and some contrast between hair and background needs the least touching up. If you have a few options, our guide to choosing the best photo for a hair color try-on helps you pick quickly.
Look over the automatic selection
A model built into the app finds the hair on your iPhone or iPad. That selection decides where the color goes. Before judging any shade, pinch to zoom and check the hairline, the ends, and anywhere hair meets shoulders or background. Drag to move around, and double-tap to reset the zoom.
A color can look off for three different reasons: the light in the photo is uneven, the intensity is too high, or part of the hair was missed. Knowing which one you’re seeing saves a lot of fiddling.
Pick a shade, or make your own
The shade row has sixteen curated colors in three groups. Natural covers Teddy Bronde through Jet Black. Trending has Copper, Auburn, Cherry Cola, Burgundy, Silver, and Rose Gold. Bold has Pink, Blue, Purple, and Green, which are the fun ones for a party look or a post.
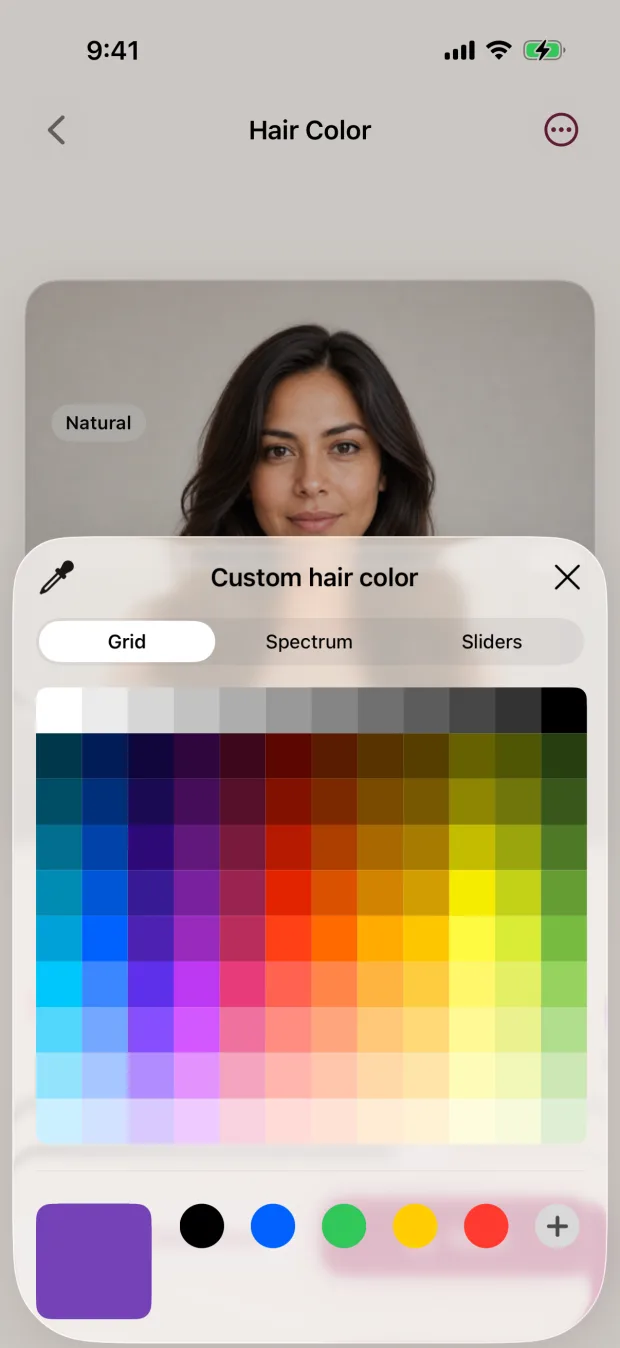
If you have an exact color in mind, maybe to match an outfit or a mood board, tap Custom. Apple’s color picker opens with a grid, a spectrum, and sliders, so you can pick any color you like.
Set the intensity
The intensity slider controls how strongly the new color covers your hair. Lower settings let more of the original color and shine show through, which usually looks more believable. Higher settings make the color unmistakable, which can be exactly right for a bold, just-for-fun edit.
A good habit is to start in the middle and look at the highlights and shadows. If they’ve gone flat, ease the slider back.
Clean up the edges in Refine Selection
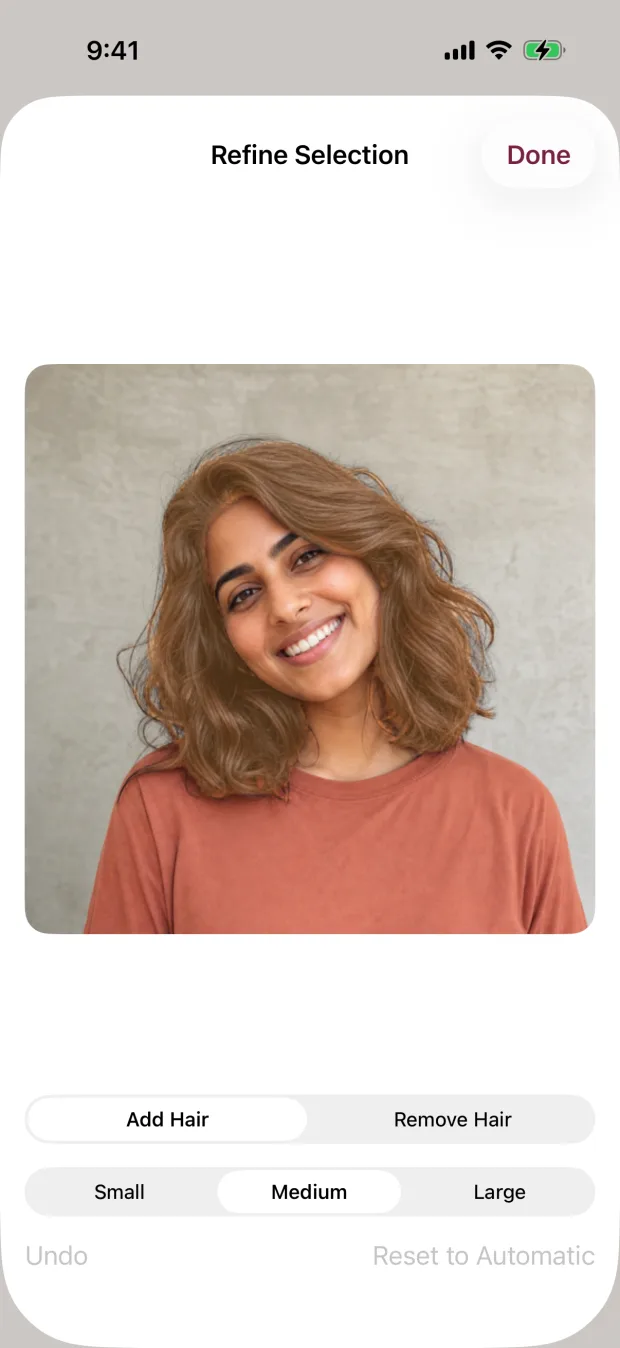
Open Refine Selection when a patch of hair hasn’t changed, or when color has crept onto skin, clothes, or background. Choose Add Hair to paint in missed strands, and Remove Hair to keep color where it belongs. Switch between the Small, Medium, and Large brushes: small for the hairline and gaps between curls, large for broad sections.
Your strokes are kept separate from the automatic selection. Undo takes back one stroke at a time, and Reset to Automatic clears all of them, so you can experiment freely.
Compare, then save
Tap Natural in the shade row to see the original photo, then tap your shade again. Flipping back and forth shows whether the edit still looks like real hair. When you’re happy, save. The app writes a new photo to your library and never overwrites the original. It asks only for permission to add photos, and only when you save.
If the edit doesn’t look right, check in this order
It’s tempting to keep swapping shades when something feels off. Usually the fix is earlier in the chain. Work through these in order and stop when it looks right.
- The photo. Harsh backlight, mixed lighting, blur, or a filter will affect every shade. If the problem shows up in every color you try, a different photo is the quickest fix.
- The selection. Zoom in. Unchanged patches or color on skin and clothes are selection issues, and Refine Selection is the fix, not a new shade.
- The intensity. Flat, painted-looking hair usually means the slider is too high for that photo. Lower it until you can see the texture again.
- The shade. Only now try a neighbor, or open Custom and nudge the color warmer, cooler, lighter, or deeper.
Edits look most real at the edges.
Spend your touch-up time on the hairline and the ends. That’s where eyes go first, and where a small brush makes the biggest difference.
Saving and sharing a clean copy
When you save, the new photo leaves out your GPS location, the original filename, the camera serial number, and other unrelated photo details. That makes it a tidier file to post or send than a straight copy of the original.
Removing hidden details doesn’t make a picture anonymous, though. Your face, the room behind you, a street sign, a reflection in a window, or a tattoo can still say who or where you are. Take a quick look at the whole image before you post it. And if you’re editing a photo of a friend, check they’re happy for you to share it.
For more on how the app handles your photos from start to finish, see what to check in a hair color app that doesn’t upload your photo.
Ideas for your edits
- A mood board of three or four shades on the same photo, saved side by side in an album
- A before and after for a friend who’s been telling you to go copper
- A bold color for a birthday, a concert, or a costume, just to see it
- The same edit on a short clip, using video hair color on iPhone
An edit is a picture, not a promise
If a photo edit turns into a real plan, remember that dye works on your actual hair, not on pixels. Starting color, past color and treatments, condition, products, and technique all shape the result. Follow the product instructions, including any strand or allergy test, and ask a qualified colorist about bigger changes. You can see everything the editor includes on the features page.
Quick questions
Can I change hair color in a photo for free?
The app is a free download, and setup shows a shade on your own photo before you pay. Full editing, Refine Selection, and saving need weekly or lifetime access. See the pricing page for the options.
Will it change my original photo?
No. Saving always creates a new photo. The original stays exactly as it was.
Can I use a color that isn’t in the list?
Yes. Tap Custom and pick any color with Apple’s grid, spectrum, or sliders.
Does it work on iPad?
Yes, on iPhone and iPad with iOS or iPadOS 17 or later. The larger screen makes edge touch-ups easier.